
Introduction
Hold a dahlia tuber in your hand and it looks like a lumpy little potato, not the source of a plant that can throw dozens of blooms by fall. That gap between the humble object and the showy flower is where most people get stuck. This guide walks you through the whole life of dahlia tubers, from what makes one worth planting to how you dig and store it for next year.
A tuber is closer to a battery pack of stored energy than to a seed. The fat body holds the carbs and water that feed the first weeks of growth. University experts agree on the basic build. A tuber has three parts: a body, a neck, and a crown. The buds we call tuber eyes sit only at the crown. Snap the neck or buy a piece with no eye, and you have a dead lump.
Here is where most guides let you down. They jump straight to dig a hole and drop it in, eyes up. They skip the one thing that decides everything: can your tuber grow at all? Growing dahlias well starts before the shovel comes out. You learn to read a tuber the way a buyer does, so you stop wasting money on duds.
Dahlias come from Mexico and Central America. They have taken off as a cut-flower favorite. That is why single tubers now sell fast each spring. Treat them right and they are a tender perennial that comes back year after year. Next you will learn how a tuber is built. You also get planting depth, timing, season-long care, and the winter storage that keeps your stock alive.
Inside a Dahlia Tuber
People often call dahlia tubers bulbs, but that one word causes most of the trouble new growers run into. A bulb stores a whole baby plant inside, ready to go. A dahlia tuber is built differently, and once you see how, you stop wasting money on pieces that will never grow.
Every tuber has three parts that work together: the body, the neck, and the crown. The body is the fuel tank that feeds the plant, and the crown is the control panel that tells it to grow. Lose either one and you get nothing, no matter how good the tuber looks in your hand.
The tuber versus bulb mix-up matters most at one spot, the eyes. Cut a potato into chunks and each piece can sprout, because a potato grows eyes all over. A dahlia grows them in only one place. Here is what each part of the tuber does and what to check before you plant.
Body
- What it is: The fat, finger-to-carrot-sized storage section that holds the starch and water the plant lives on until roots and shoots form.
- Why it matters: A firm, plump body signals a healthy tuber, while a soft, shriveled, or hollow body means the tuber has dried out or rotted.
- Size guide: A flowering tuber should be larger than a pinky finger or a AAA battery; smaller pieces rarely have the reserves to bloom.
Neck
- What it is: The narrow link between the body and the crown that carries everything the eye sends down into the tuber.
- Why it matters: The neck is the most fragile part, and a broken neck makes the whole tuber non-viable no matter how large the body looks.
- Handling tip: Lift and carry tubers by the body, never by the stem, so you do not snap the neck during digging or division.
Crown
- What it is: The shoulder of the tuber where it joins the old stem, and the only place dahlia eyes ever form.
- Why it matters: Without at least one eye on the crown the tuber cannot produce a plant, which is the single most overlooked failure point.
- What to look for: Small bumps or pinkish points near the crown are eyes; some varieties are slow to show them until warmth wakes them up.
Eyes
- What they are: The growth buds that swell into stems, and they appear only at the crown rather than across the body like a potato.
- Why they matter: Every division you plant must carry at least one eye, or it will sit in the ground and slowly rot instead of sprouting.
- Spotting them: Eyes look like tiny nubs and become easier to see if you let tubers warm up for a few days before planting or dividing.
Put it together and a viable tuber is simple to define. UC Master Gardeners say a flowering tuber should be larger than your pinky finger or a AAA battery. OSU Extension adds that it must be firm and plump with at least one eye and no broken neck. A fat body alone fails that test.
This is also why a snapped tuber neck ends the story. The neck carries everything the dahlia tuber eye sends down from the tuber crown, so when it breaks the eye loses its link to its fuel. Lift tubers by the body, never the old stem, and you protect that fragile join.
The 'eyes' or growth buds occur only in the area connecting with the underground stem. If the tubers are pulled off or if they break off, the buds are almost always lost and the tubers are worthless.
Planting Dahlia Tubers
I knelt at my back-fence raised bed in zone 5 one warm morning in mid-May and pressed my fingers into the soil. It held heat a few inches down, so I laid the first Cafe au Lait tubers flat on their sides with each eye facing up. My watering can sat full beside me, and I left it there and walked away.
That patience is the part most new growers skip. How to plant dahlia tubers well comes down to three numbers from university extensions. Warm dry soil beats an eager early start every time. Get the timing, the depth, and the watering right, and the rest of the season takes care of itself.
Soil temperature is your green light. OSU Extension says to wait until the soil holds about 60°F (15.5°C) for several days. That window usually lands between late April and the end of May. Cold, wet soil is the real risk here. A dormant tuber sitting in it tends to rot before it can sprout. That early gamble gives you weak plants and poor blooms instead of a head start.
Plant only after the last frost passes and soil holds about 60 degrees Fahrenheit (15.5 Celsius) for several days, usually late April through the end of May.
Loosen well-draining soil and dig 4 to 6 inches (10 to 15 centimeters) deep into ground amended with compost, since dahlias are heavy feeders that need rich, loose soil.
Lay the tuber flat on its side with any visible eye facing up, spacing plants 18 to 24 inches (46 to 61 centimeters) apart, or 3 to 4 feet (0.9 to 1.2 meters) for large varieties.
Backfill the hole and do not water yet, because moisture on a dormant tuber in cold soil causes rot before the plant can use it.
Push a stake in beside large or dinner plate varieties at planting time so you avoid spearing the tuber later once the plant fills out.
Begin regular watering only after green shoots break the soil surface, then keep the soil evenly moist since dahlias are not drought-tolerant once growing.
The numbers that matter most are simple. UGA Extension sets the planting depth at 4 to 6 inches (10 to 15 centimeters). That depth gives steady moisture but keeps the sprout close to the light. For dahlia spacing, give small and medium plants 18 to 24 inches (46 to 61 centimeters). Large varieties need a full 3 to 4 feet (0.9 to 1.2 meters) so air moves freely between them.
Set each tuber on its side with any visible eye pointing toward the sky, the eyes up rule that beginners hear about most. Then resist the urge to soak it. A June planting can feel late, but those tubers often hand you the most perfect fall flowers, with peak bloom in September and October.
Do not water dahlia tubers right after planting. A dormant tuber sitting in cold, wet soil rots easily, so hold off until green sprouts break the surface.
Growing and Caring for Dahlias
From the kitchen window one July morning, my biggest Cafe au Lait sat face-down in the dirt. A storm had rolled through the night before and snapped the main stem clean against the soil of the back-fence raised bed. That plant never got a stake, so the first hard wind it met laid it flat.
That afternoon I dropped a wire cage over every other plant in the bed. Good dahlia care starts with this kind of support, because the stems are hollow and a heavy bloom acts like a sail in any storm. Setting your staking in place at planting time means you skip the spike straight through the tuber later on.
Here are the core jobs that keep a plant strong and full of flowers all season long.
Hold off on watering dahlias until you see green sprouts break the surface, since soaked soil rots a tuber before it can grow roots. Once the plant is up and running, give it even, deep moisture so the soil never dries out hard between drinks. Steady water keeps the buds coming and stops the flowers from stalling in summer heat.
Dahlias are heavy feeders. Loose, rich soil and a steady food supply lift your bloom count. When fertilizing dahlias, reach for a lower-nitrogen feed. Too much nitrogen pushes leafy growth and leaves you short on flowers. A low-nitrogen mix sends that energy into buds instead.
Pinching is the cheapest way to get more flowers from a young plant. Top the main sprout right above the upper two leaves once the plant has a few sets of leaves. That single snip makes the plant branch out into a bushier, fuller dahlia instead of one tall, weak stalk.
Pinch out the growing tip above the upper pair of leaves on young plants. Topping that single sprout makes the plant branch into a bushier, more productive dahlia.
There is a plain reason pinching works so well. A dahlia's top growth roughly matches its root system below the soil, so an early pinch builds a stronger plant with more blooms over time. Want the largest single flowers? Try disbudding. You pinch off the two small side buds beside each main bud. The plant then pours all its food into one big show flower.
Deadheading keeps a plant in bloom by clearing off spent flowers before they set seed. Spent dahlias turn pointed and tight while fresh buds stay round, so use that shape to tell them apart. Snipping fresh flowers for the vase does the same job. Cut them in the cool of early morning and the plant pushes out even more blooms all season.
Digging, Dividing, and Storing
Overwintering dahlias is where most growers lose their plants. Dahlias are tender, so they will not survive a hard freeze in the ground in cold zones. The good news is that digging dahlia tubers and getting them through winter is simple once you treat storage as a balancing act, not a guess.
Wait to dig until after the first hard frost that blackens the foliage. Do not rush it, because tubers keep maturing for a while even after the tops die back. That extra time in the soil builds the food reserves each tuber needs to wake up strong in spring.
Lift the clump from 12 to 18 inches (30 to 46 centimeters) out from the stem. Dig wide on purpose. The brittle necks snap right where they join the crown, and a broken neck kills that tuber, so a generous circle keeps your spade away from the parts that matter most.
Next comes the cure step that thin-skinned tubers depend on. Let the clump rest a few days at 60 to 70°F (15.5 to 21°C) out of direct sun. This dries the cut surfaces and the skin just enough to fend off rot before the tubers head into cold storage.
The whole game in storing dahlia tubers is keeping them in the safe middle. Too wet and they rot. Too dry and they shrivel into useless husks. Hold the storage temperature between 35 and 50°F (1.5 to 10°C). Pair that with about 70% humidity, and you stay clear of both failures.
That cold range matters more than it sounds. Below 35°F you risk freezing the tubers, and warmth above 50°F coaxes them out of dormancy too soon. The humidity does the other half of the work, because a dry basement pulls moisture straight out of thin skins over a long winter.
Pack the tubers in a dry medium like vermiculite, sand, peat, or wood shavings so none of them touch. One soft, rotting tuber can spread to its neighbors fast, and that cushion of medium keeps a single bad apple from taking down the whole box. Check the box every few weeks and pull anything that has gone mushy. Even with good conditions, about 20% can be lost to rot or dehydration, so a quick monthly look pays off.
Dividing dahlia tubers is the spring half of the cycle. Split each clump every 1 to 3 years so it does not turn into a weak, crowded cluster that flowers poorly. Every division you cut must carry a piece of crown with at least one eye, since that crown is the only place new shoots can form. A fat tuber with no eye is just dead weight.
Delay cutting dahlia stems until right before digging, because the stems are hollow and can collect water, which in turn promotes crown rot and tuber decay.
Dahlia Types and Varieties
From my kitchen window at dusk, the near-black Karma Choc blooms glow against the back-fence raised bed I built. Right beside them sits the soft blush of Cafe au Lait, pale as cream. The dark heads almost vanish into the shade while the light ones float, and the same bed reads two ways depending on which form you plant where.
That contrast is the whole point of learning dahlia varieties before you buy. Form and color decide which tubers earn their bed space, not size alone. Pick by photo and you often end up with a flower that looks nothing like the bed you pictured in your head.
Dahlia flowers range from 1 to 14 inches (2.5 to 36 centimeters) across. They come in almost every color except true blue. The main dahlia types sort by petal shape. Those flower forms shape how a plant looks, how tall it grows, and how much help your plants need in a storm.
Form also decides who else shows up. The open, single forms with a visible center are the ones honey bees and bumble bees can feed from. Single versus double dahlias is a real choice for your garden. The doubled heads look full, but they give pollinators almost nothing to land on and eat.
Dinner plate dahlias sit at the far end of the size range and need their own plan. They can reach 10 to 14 inches (25 to 36 centimeters) across. So you want to give them wider spacing and sturdy staking than the smaller ball or pompon types ever need. Here are the main flower forms to weigh before you pick your tubers.
Dinner Plate Dahlias
- Size: The largest form, with blooms reaching 10 to 14 inches (25 to 36 centimeters) across on tall, sturdy plants.
- Look: Full, rounded heads packed with broad petals that make dramatic focal points in a border or bouquet.
- Spacing: Give these the wide end of the range, around 3 to 4 feet (0.9 to 1.2 meters), so air moves well around them.
- Support: Stake at planting time, since the heavy heads flop or snap stems in summer storms without support.
- Best for: Gardeners who want statement blooms and have the room and patience to keep them upright.
- Consider: Fewer, larger flowers per plant, so disbudding side buds pushes energy into showpiece heads.
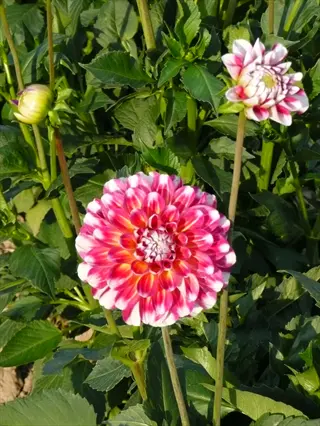
Ball and Pompon Dahlias
- Size: Compact, rounded blooms from about 2 inches (5 centimeters) on pompons up to about 6 inches (15 centimeters) on balls.
- Look: Rolled petals form a near-perfect sphere with a geometric, honeycomb pattern.
- Habit: Generally shorter and bushier than dinner plates, which makes them easier to support.
- Best for: Cutting gardens, since the firm round heads hold up well in arrangements.
- Productivity: Plants tend to pump out many blooms once they get going through late summer.
- Consider: The dense doubled centers offer little to pollinators compared with open forms.
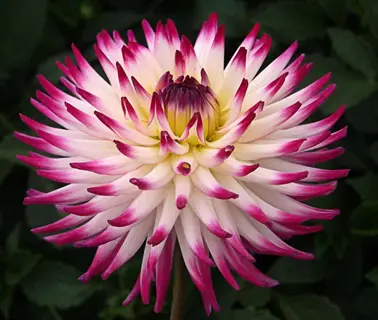
Cactus and Semi-Cactus Dahlias
- Size: Medium to large heads, often 4 to 8 inches (10 to 20 centimeters) across depending on the variety.
- Look: Narrow, pointed, sometimes curled petals that give the flower a spiky, star-burst texture.
- Appeal: The quilled petals add motion and depth that flat-petaled forms do not.
- Best for: Gardeners who want a bold, modern texture in beds and bouquets.
- Support: Taller types benefit from staking like other large dahlias.
- Consider: The detailed shape can shed petals faster, so cut for the vase as blooms just open.
Single and Collarette Dahlias
- Size: Smaller and lighter, with open faces a few inches across on airy plants.
- Look: A single ring of petals around an open center, with collarettes adding a frilly inner collar.
- Pollinators: These open-centered forms are the ones honey bees and bumble bees can actually feed from.
- Best for: Wildlife-friendly and naturalistic plantings where movement matters more than mass.
- Habit: Often quicker to bloom and less top-heavy than the giant doubled forms.
- Consider: Shorter vase life than tightly doubled types, so enjoy many of them in the garden.
Pests, Diseases, and Solutions
Almost every dahlia problem traces back to one of two places. Chewing pests work from the top, shredding fresh shoots and petals. Moisture problems work from below, rotting the tuber and crown out of sight. Once you know where to look, you fix issues fast instead of guessing.
Most lists of dahlia pests stop at naming the culprit. That leaves you knowing the slug ate your shoots but not what to do next. Below, each common pest and disease comes paired with a real fix, so you can act the same day you spot trouble.
The big four cover most of what you will face. Slugs on dahlias and other chewers handle the damage you see up top. Crown rot and storage mold handle the damage you smell when you open the box in spring. Match the symptom to the row and follow the fix.
Slugs and Snails
- Damage: They chew ragged holes in young shoots and leaves, often overnight, hitting new growth hardest.
- Fix: Hand-pick in the evening, clear hiding spots, and use barriers like wool pellets or copper bands around plants.
- Prevent: Water in the morning so the surface dries by night, since damp soil at dusk invites them.
Earwigs, Beetles, and Aphids
- Damage: Earwigs and Japanese beetles ragged the petals and leaves, while aphids cluster on soft new growth.
- Fix: Knock pests into soapy water, use insecticidal soap on heavy aphid colonies, and trap earwigs in rolled newspaper.
- Prevent: Keep plants healthy and favor hand-picking over broad sprays so you protect the bees that visit single forms.
Crown and Tuber Rot
- Cause: Hollow stems collect water and promote crown rot, while cold, wet planting soil rots dormant tubers from below.
- Fix: Cut stems only right before digging, store tubers at about 70% humidity, and remove any rotting tuber promptly.
- Prevent: Plant only once soil reaches about 60 degrees Fahrenheit (15.5 Celsius) and hold off watering until sprouts emerge.
Storage Mold
- Cause: Disease can enter through a damaged neck or cut, then spread in storage that is too warm or too damp.
- Fix: Sanitize tools and optionally dip tools or tubers in a 1 to 10 bleach-to-water solution before storing divisions.
- Prevent: Cure tubers a few days before storage and check the box every few weeks, pulling any tuber that starts to soften.
The worst dahlia diseases share one root cause, and it is water in the wrong place. Cold wet soil rots dormant tubers from below, a damaged neck lets rot walk in, and a too-damp storage box finishes the job. Break that chain and tuber rot stops before it starts. Wait until the soil hits about 60°F (15.5°C), hold off watering until sprouts show, and keep your storage box just barely moist.
One more thing protects both your plants and your pollinators. Open single dahlias feed bees, so reach for targeted controls first. Hand-pick slugs at dusk, set out barriers, and knock beetles into soapy water. Save the sprays for heavy aphid colonies, and even then aim only at the leaves that need it.
Leave dahlia stems uncut until right before you dig. Hollow stems funnel rain into the crown, and that trapped water is a leading cause of crown rot and storage loss.
5 Common Myths
Dahlia tubers are bulbs, so you plant and treat them exactly like tulip or daffodil bulbs.
Dahlias grow from tuberous roots, not true bulbs, and their eyes sit only at the crown rather than throughout the body.
Bigger dahlia tubers are always better, so you should buy the largest tubers you can find.
Size matters less than an intact neck and at least one eye; a tuber larger than a pinky finger or AAA battery flowers fine.
You should water dahlia tubers right after planting to help them get started quickly.
Watering before sprouts appear causes rot; tubers hold enough moisture to root, so wait until green shoots break the surface.
Dahlias are annuals that die off completely, so you have to buy new tubers every single spring.
Dahlias are tender perennials that return each year in mild zones and survive cold winters when their tubers are dug and stored.
Once dahlia foliage is killed by frost, you must dig the tubers up immediately or lose them.
Tubers keep maturing for a time after the first frost, so waiting a week or two before digging actually improves storage.
Conclusion
Everything you learned here starts with the same small thing you held in your hand at the very beginning. A good tuber needs an intact neck and at least one eye at the crown, because that neck and that bud are where the whole plant comes from. Get those two things right and the rest of the cycle falls into place.
From there, the numbers carry you through the season. You plant dahlia tubers once your soil holds near 60°F (15.5°C) for a few days. You dig after the first hard frost, then move into storing dahlia tubers somewhere between 35 and 50°F (1.5 to 10°C) through the cold months. Each step protects the one before it.
Here is the payoff that makes the work worth it. One good tuber turns into a fat clump by fall. That clump gives you several new tubers plus dozens of blooms. Dividing dahlias each winter splits that clump into more plants. So growing dahlias becomes a collection that grows every year on its own.
None of this rewards a rush. The best blooms come from patient, later plantings and from careful storage that you check now and then over winter. Treat the dig-and-store habit as part of the fun rather than a chore, and a single season's tubers will keep paying you back for years.
Glossary
- crown
- The shoulder of a dahlia tuber where it joins the old stem, and the only place dahlia growth eyes form.
- disbudding
- Removing side flower buds so the plant channels energy into fewer, larger blooms on longer stems.
- eye
- A growth bud on the tuber's crown that swells into a stem, so every viable division must carry at least one.
- neck
- The narrow link between a dahlia tuber's body and crown; if it breaks the whole tuber becomes unusable.
- pinching
- Removing the growing tip of a young plant so it branches into a bushier, more productive dahlia.
- tender perennial
- A plant that lives for years but cannot survive freezing, so its tubers must be lifted and stored in cold climates.
- topping
- Pinching out the sprout between the upper two leaves of a dahlia to encourage a bushier plant.
- tuberous root
- A swollen root that stores starch and water and grows new plants, which is what a dahlia grows from rather than a true bulb.
External Sources
Frequently Asked Questions
What is the best month to plant dahlia tubers?
Plant after the last frost when soil reaches about 60 degrees Fahrenheit (15.5 Celsius), usually late April through the end of May.
What is the difference between a dahlia bulb and a tuber?
Dahlias grow from tuberous roots, not true bulbs. The growth eyes sit at the crown where the tuber meets the old stem.
Can I just leave dahlia tubers in the ground over winter?
Only in mild winter zones. In cold climates the soil freezes and kills the tubers, so they must be dug and stored.
Why do you put cinnamon on dahlia tubers?
Many gardeners dust fresh division cuts with cinnamon as a low-cost natural fungicide to slow rot during storage.
Do dahlias come back every year?
Dahlias are tender perennials. They return yearly in mild zones but die in freezing ground unless tubers are lifted.
Why are dahlia tubers so expensive?
Tubers are divided and stored by hand, multiply slowly, and rare new varieties are limited, which raises the price.
What are the most common dahlia growing mistakes?
Common mistakes are:
- Planting into cold, wet soil before it reaches 60 degrees Fahrenheit
- Watering before sprouts emerge, which rots the tuber
- Skipping staking, pinching, and dividing crowded clumps
How many years does a dahlia tuber last?
A clump can produce for many years if you divide it every one to three years and store the tubers correctly each winter.
What triggers dahlia tubers to sprout?
Warm soil near 60 degrees Fahrenheit (15.5 Celsius), light moisture, and a healthy eye on the crown trigger sprouting.
How many flowers come from one dahlia tuber?
One healthy tuber grows into a full plant that can produce dozens of blooms across a long late-summer to fall season.